Web Hosting Services for Students
SUNY Plattsburgh does not provide web hosting services for students (or for faculty). However, the college has a Microsoft agreement that allows students access to Microsoft Office 365, which allows for the hosting of websites, blogs, and other applications. The service also lets you download Microsoft Office applications (e.g., Word, Excel, PowerPoint, etc.).
Obtaining an Off-Campus Website Account
The web-hosting program is called Microsoft Azure for Students Starter Offer and it is free. The steps below will guide you through process of signing up.
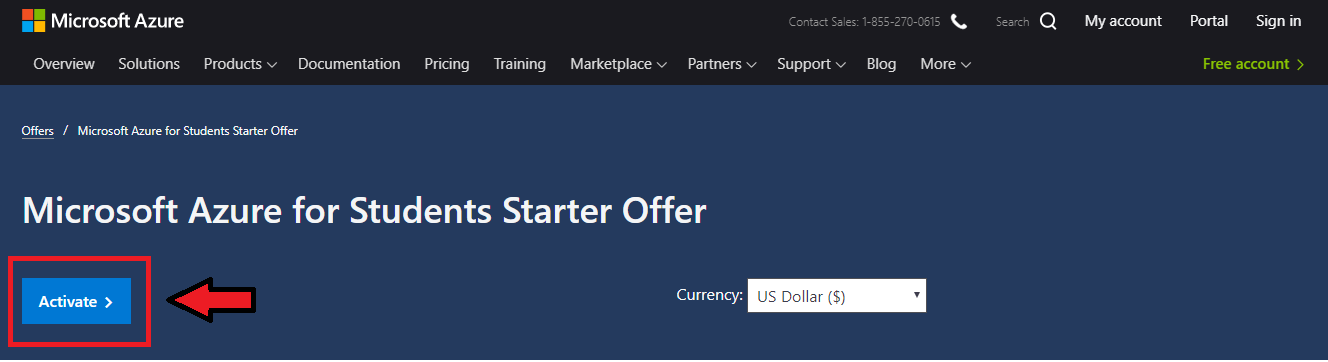
- Go to the Microsoft Azure for Students Starter Offer website.
- Next, click on “Activate” as shown in the below screenshot.
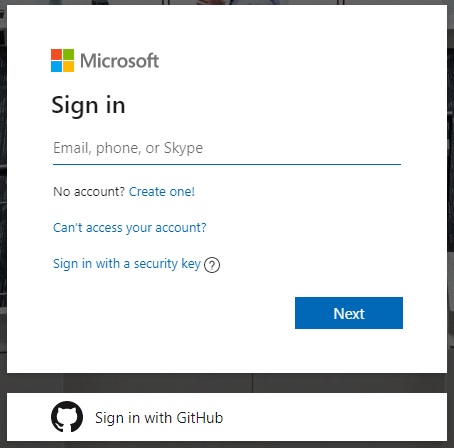
- Sign-in with your Microsoft account.
- If you do not have a Microsoft Account, click on “Create one!” and follow the onscreen instructions to create your Microsoft account.
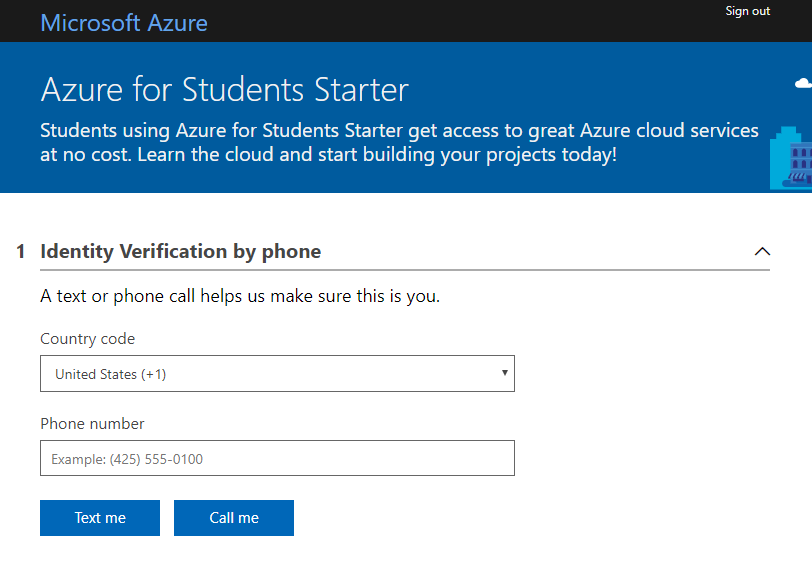
- Identity Verification by phone
- Enter your phone number and select either “Text Me” or “Call me” to verify your account and follow the onscreen instructions.
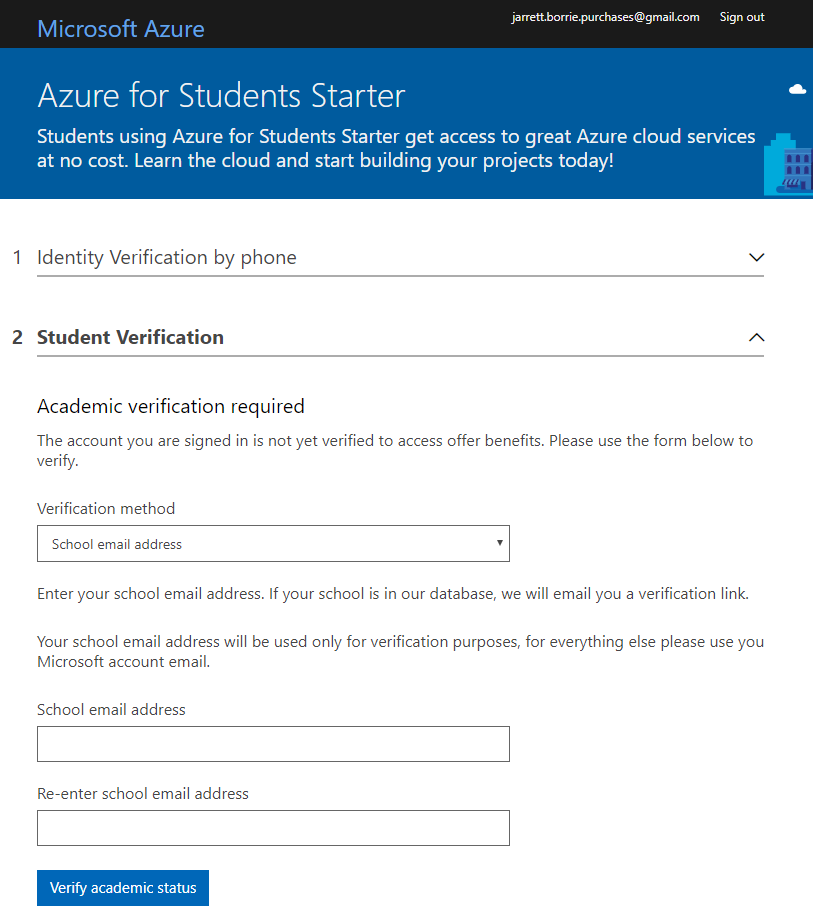
- Student Verification
- Enter your SUNY Plattsburgh email address (example: [email protected]) into the fields and then click on “Verify academic status”.
- Next, after clicking on “Verify academic status”, you should receive an email in your SUNY Plattsburgh student email account. Follow the instructions in the email to complete the “Student Verification” step.
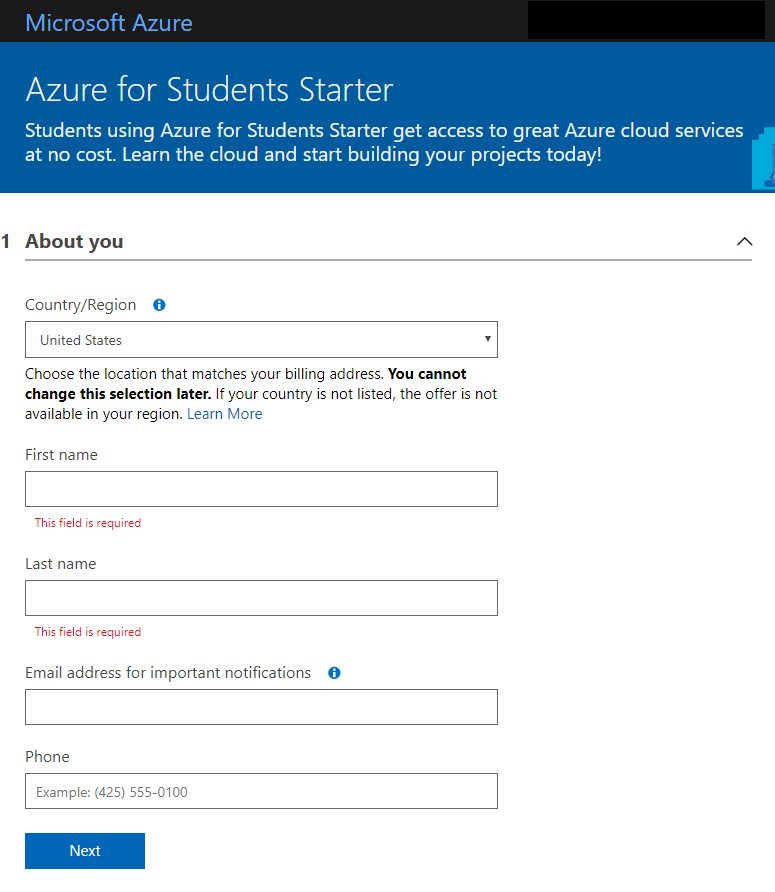
- About you
- Fill out all information in this section and once completed click on “Next”.
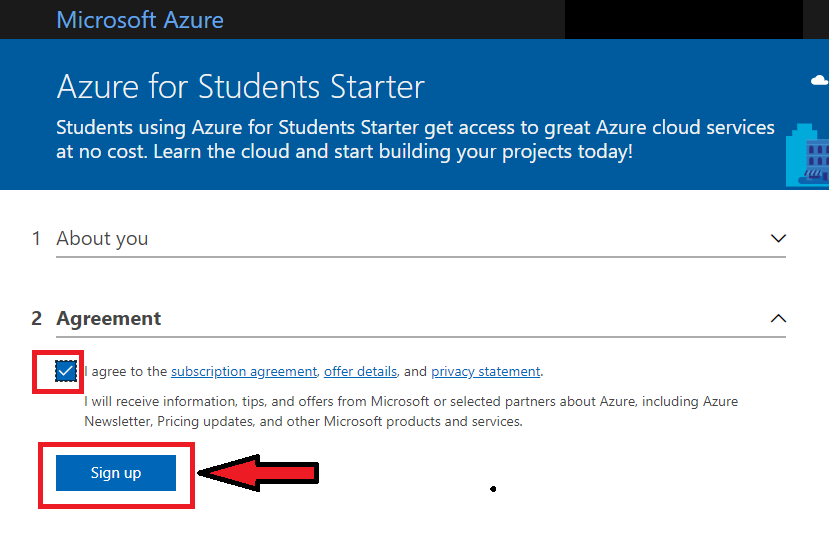
- Agree to the terms of use
- Now, you will have to agree to the terms of the service by clicking on the checkbox as shown below and then clicking on “Sign Up”.
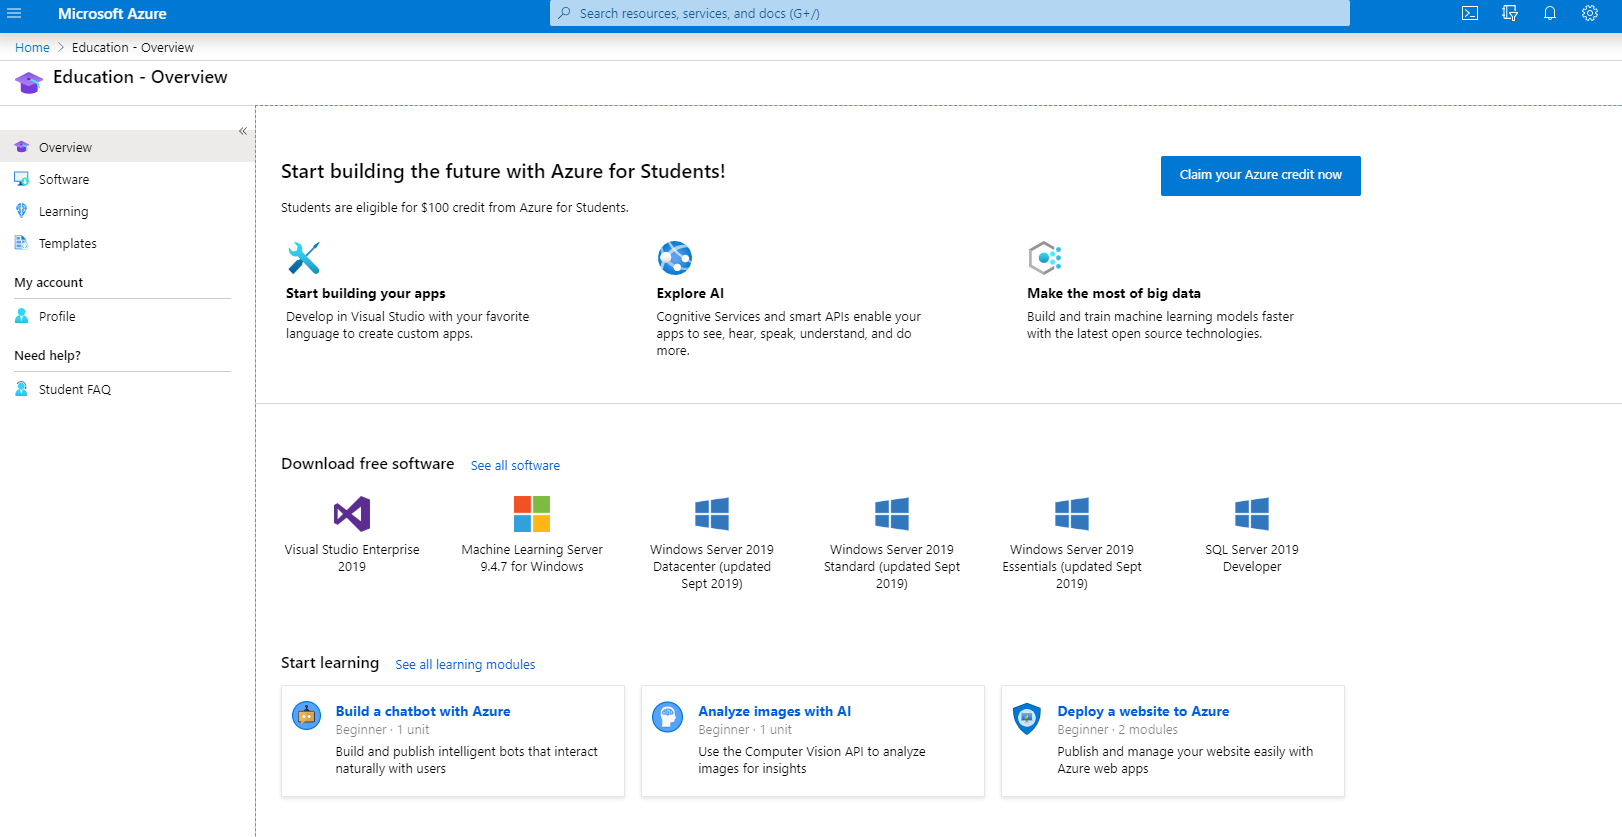
- You are now signed into Microsoft Azure!
- After agreeing to the terms of use you will be brought to the Azure Portal webpage where you can explore all available services. For a simple website you will want to sign up for Azure “App Services” that will give you FTP access to an area where you can upload your HTML files.
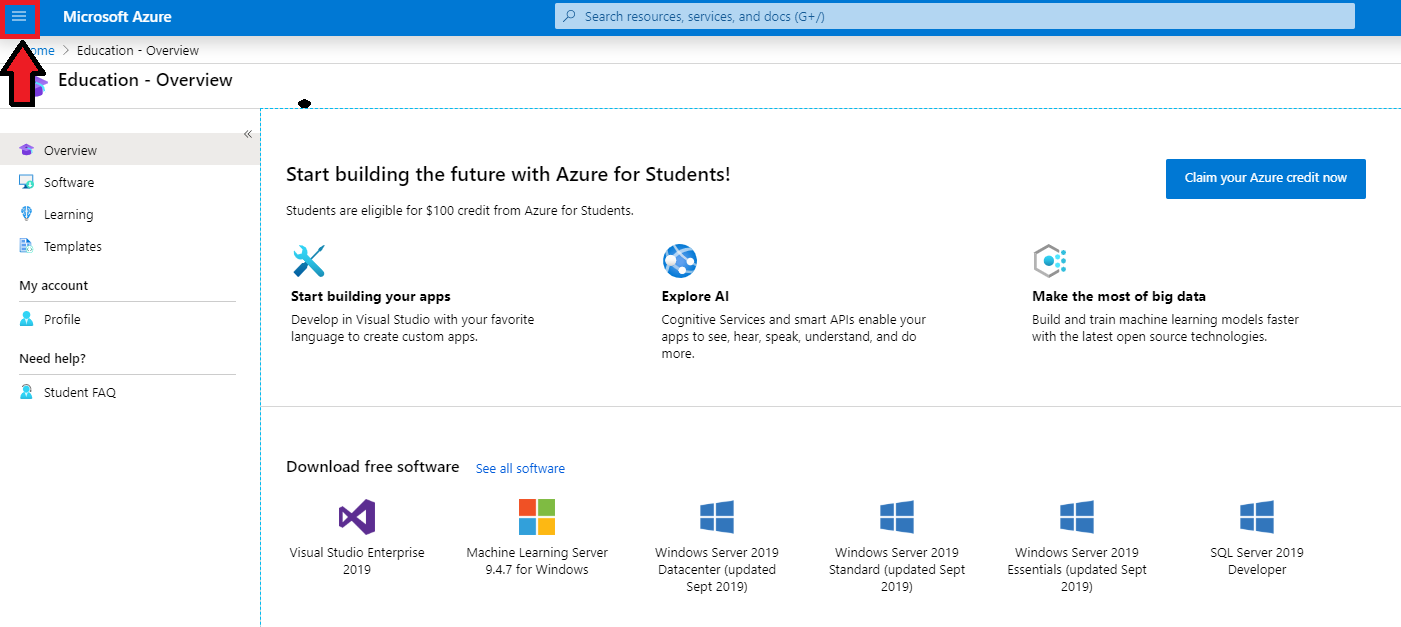
- Try out creating an “App Service”
- Click on the menu icon located in the top left-hand corner of the screen
- Next, click on “App Services”
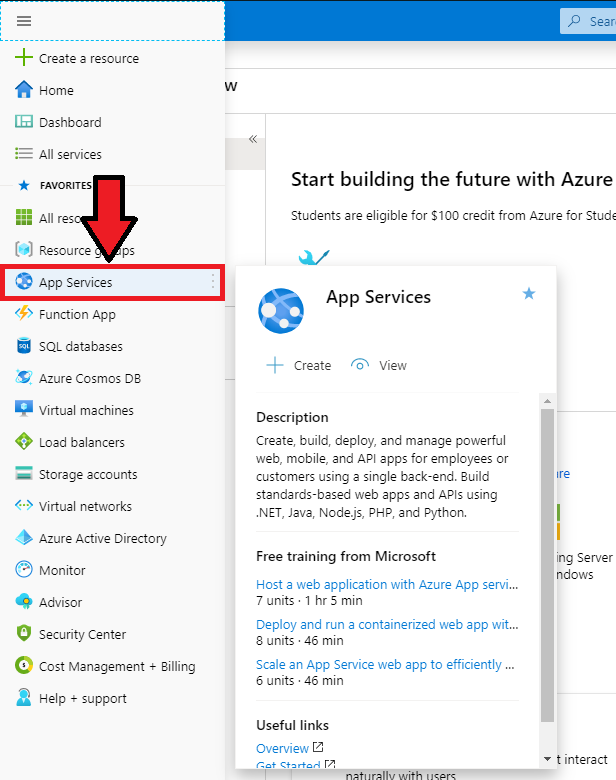
- Now, click on “+ Add”, you will now be directed to a new page to setup your “Web App”.
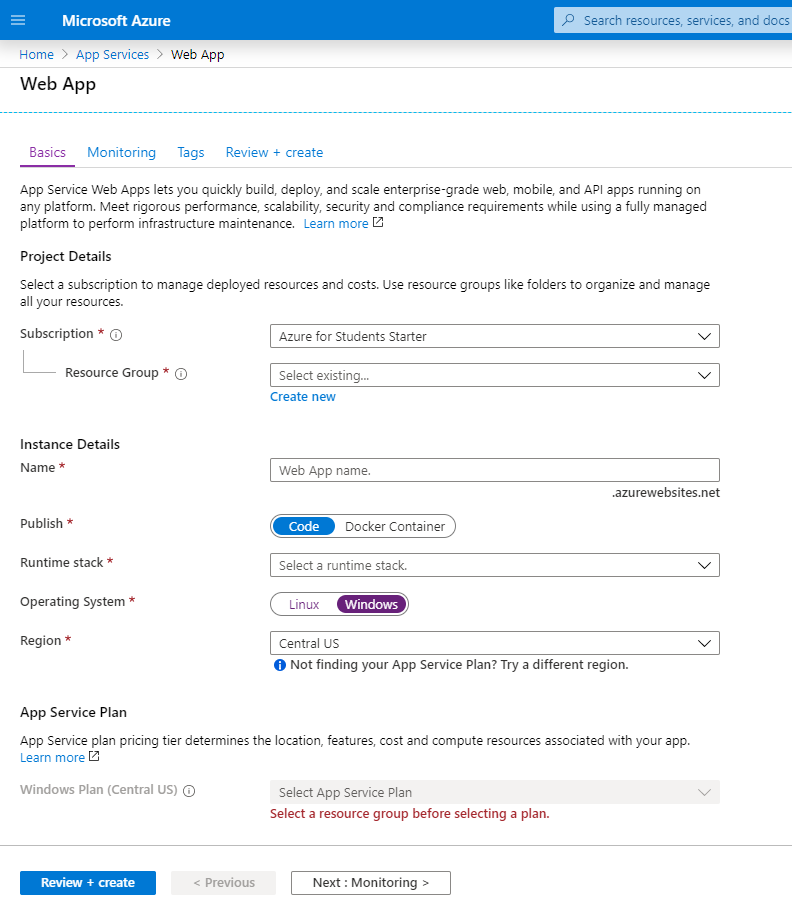
- Next, fill out all information under the “Basics” tab and then click on “Review + create”. Once completed, your new site will automatically have the free student subscription applied to your new “Web App”.
- You will receive FTP credentials after setting up your new platform.
- We have created a short how-to video for using FTP with your new Azure website. In this video we use the free FileZilla FTP client.
- If you are not familiar with FTP, Visual Studio allows you to write your HTML code directly in the application and then "upload" to Azure directly. See this blog page on Microsoft's developer network website for more information.
- Last, there are other free options out there that can be used by students and educators alike to host websites for free. For instance, Gwiddle and SiteGround are two popular options offering free accounts to students. ITS has not tested and does not endorse either of these services.